Thursday, 27 July 2017

Ragnarok - Day 33

So today ended up being a rather productive day and I have loads of pics to post.  I finished building the waystation and decided it needed to be walled in.  There were too many wild dinos running around and getting stuck on things so I started a wall.  Which became many walls.  I kind of got carried away and ended up making a wall sampler.  Now I have to note that its not all finished yet but its WELL into the construction. 


I'm going to start with this pic.  Obviously a night shot but gives a rough look at all the diff wall types I made.  I also made one entranceway (the other will be placed on the left of this image where there is currently no wall).  The I didn't want the entrance to have a gate as such so I build a bridge structure with sloped trapdoor 'drawbridge'.
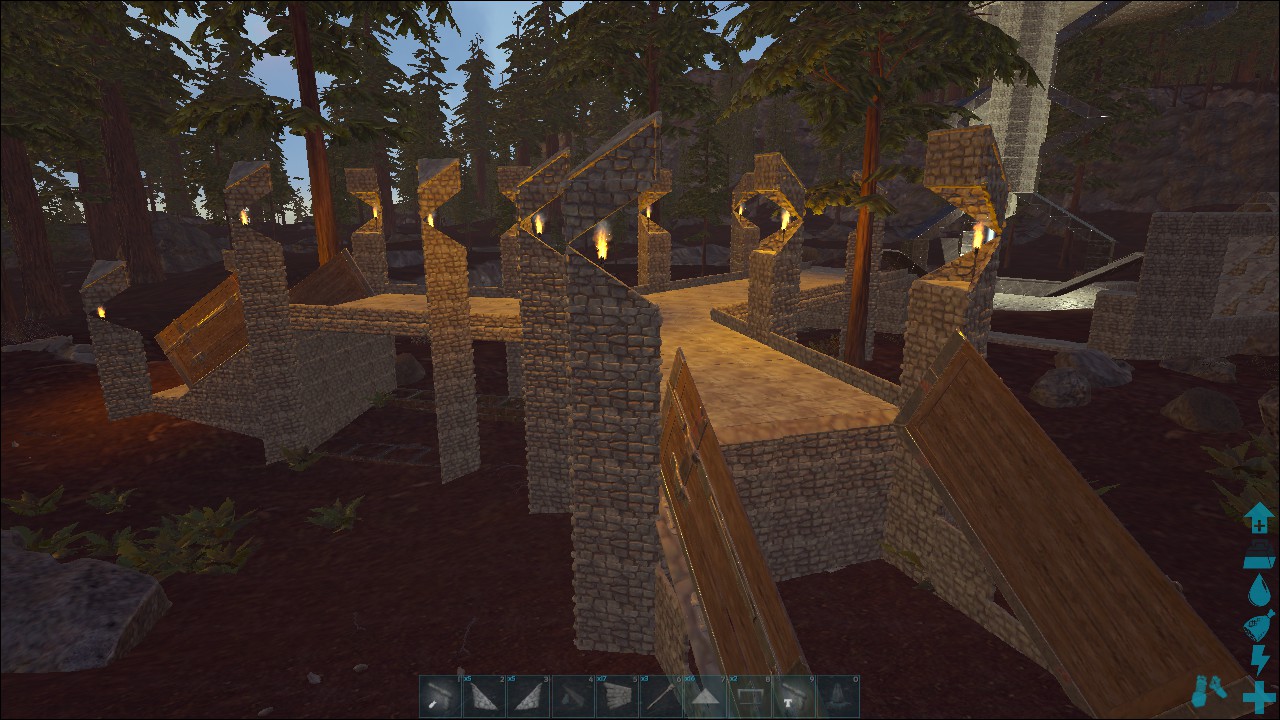
I've used this kind of 'drawbridge' in the past to great effect.  I like it because gates can often detract from designs.  


I'm extremely happy with how the lighting turned out on this one.  I cheated and used two glass walls at the front.  I could probably have managed some funky snap point connections but this was far quicker and less fiddly to deal with.


As I've said before I'm not a big fan of ceiling thick structures and like a little bit of something to make them look more sturdy.  In this case I decided I wanted a halfwall above and below.  For those of you that don't know how to achieve this kind of snap here is the basic idea.  You simply add a wall under the ceiling and a railing will happily snap into place.  


Its not a hard snap to get in fact it seems to rather like this exact position and doesn't jump around as much as other snaps often do.  Simply remove the wall and hey presto you have a halfwall above and below.


You can sink the top railing so it snaps to the bottom one or keep it sitting on top of the ceiling.  I kept it on the ceiling as I wanted the nice line that it produces.
 

This is the first section of wall I did.  I wanted to see if I could add some basic scrolls to a wall.  I could have made them 3d but I wanted something more in line with being an actual wall.  When building a wall as long as the first couple of layers are solid small dinos can't get through.  The top doesn't have to be solid because bigger dinos sure as hell can't fit :)


It looks far better at night but then again I think most things do in this game :)


This is the second section of wall that I did and its far from completion.  I had an idea for the next section of wall so I didn't finish this one off.  Its missing its capping on the right as well as the entire outside.  


I need to work on the lighting on this one but I had only chucked a few random torches in for the night shot screencap.  I will repost when its complete.  


Now this is my favourite!  Zig zag walls and an entrance that looks nice and grand!  This leads onto the walkway that I posted up top.  This is why some of the walls weren't completed before moving to the next.  I had an idea for this side and just went with it.  If I have a good idea I often will stop what I'm doing to pursue it while it was fresh.  And in this case it worked out perfect.


Here is the day shot on it.  Not quite so awesome without the 'mood lighting' but its definitely got presence!


This wall I tried something new.  Alternating sides I snapped tri ceilings into place and built up off them.  It allowed me to make structures that didn't quite touch which shows glimpses of the outside.


It looks great at night especially as your moving around it.  Lighting really makes a difference.  There are times where I wish the game was all night time.  Then I run into troodons and wonder what I was thinking lol.


I went with a checker board design on this wall.  It was remarkably quick to put up in comparison to the other sides.  Probably because its mostly just a few lines of ceilings across with some wall seperations.  But again it turned out looking pretty good.  I had originally thought to cap the top but I think it looks better that I didn't.


Here is the night shot.  Again it needs some work done in regards to lighting so that there is better coverage.  Another I will repost once I get it sorted.  


The waystation was completed although looking at it now I think I may have forgotten to add the extra round of ramps to the foundations.  I must check into that lol.


This sides of the waystation supports are now capped and as you can see the sections that have no support have a hollowed out groove.  I wanted it to look like it just slots together :)


Here is the top telepad.  Nice and basic!


And while I was up capping the top telepad I looked down to see this.  I really really like how this is looking!  Views like this are why I enjoy building in Ark :)

Wednesday, 26 July 2017

Ragnarok - Day 32

So I had another day off yesterday.  I had plenty of time to play but I really wasn't feeling it.  I disable the collision check code and completely spaced on testing to see if it fixed the bug I had.  Thats because I loaded up and looked at what I had made and decided on a slightly different route.  I decided to do some scrollwork without the 'wings' on the side.  Vanilla scrolls I suppose you could call them.  I went with this idea as I wanted to be able blend them into the tower a bit more.  I'm splitting my waystation into two.  I have a ground access teleport, a tower and then another air access teleport on top.  I wanted this for moving the quetz cage around the map without risking it so close to the ground.  I could have just put a shield down but I wanted to avoid using shields.  I used shields for this when I played online as I was trying to avoid adding too many structures to the map.  This was back when I was under the impression that structures caused server lag and was trying not to make others gameplay suffer.


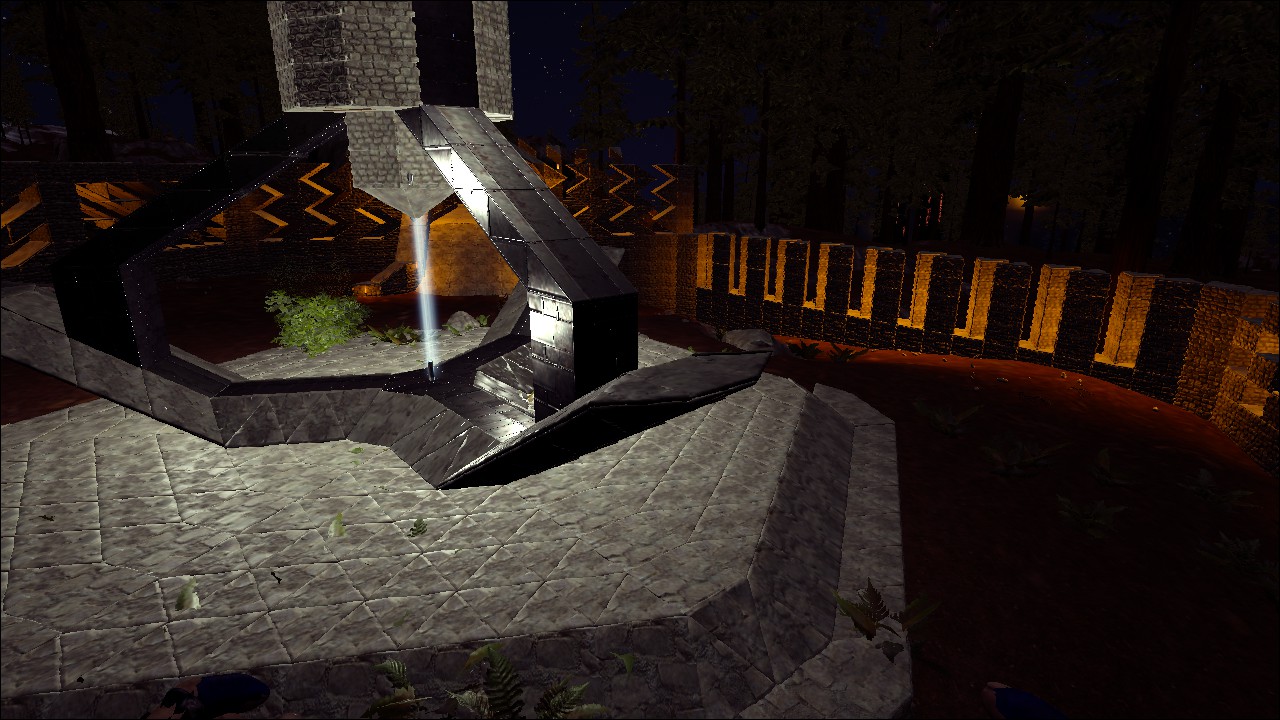
I still need to add more foundations to support the platform thats going on top and then blend that into the ground.  I laughed when I got to this point and started snapping the screencaps as it looks like I've built a mini obelisk.  I had even added a transmitter into the structure so the beam of light appeared.  I wanted that for dark nights so it was easier to spot the location.


The tower isn't crazy tall.  I considered making it above the tree line which I could have done easy enough but the area is open enough not impede a quetz cage flying too or from the top.  This is meant to be just a way station not another monolith lol.  I spent a number of hours on this project and am quite pleased with the result.  I don't think it will take too much longer to complete it as long as I don't hit any hiccups.  The top platform will have a ridge around the outside to add to the look of thickness.  I want it to look solid and just a ceiling would look flimsy.  I've checked the teleporter range and it comes out to the edge of the scroll.  I'll add some extra angle shots once I've completed it.

Monday, 24 July 2017

S+ Bug?

Was trying to get some building in this morn and encountered this problem.  I know there was changes to collision code but I thought that was only relating to foreign objects not other building blocks.


So it comes up saying obstructed so I removed the wall and attached ceiling.


Now it will place.


Adding the wall back in and again can't place?!?  I've built like this recently and not had an issue.  Something perhaps broke in one of the last big updates?  I'm going to post this to the S+ bug section I will mess with the collision code after work to see if it makes a diff.

Ragnarok - Day 31

Not a huge building day I'm afraid.  Spent a fair bit of time exploring the map to find a spot to build my first way station.  I did however build a deepwater pier for the new submarine.  The lil dock area I orig built is way too shallow for the likes of that.  Oh and for anyone else that is curious:  No I don't have leeds on this map.  I had a few private messages asking about it :)  I think the leeds was a bad addition to the game.  So many people love rafts and raft building especially early game to have Leeds there just to mess with them (wouldn't be so bad if blocking the raft in foundationss worked as armour) is a bit of a dick move.  I also don't have Giga or Titano's on this map.  These are dino's that I don't think belong in PvE and its my world so its my rules ;)


I decided to use the underwater pods for this pier so that I could do the glass sides and see underwater much better.  The glass sides took much longer than I would have liked due to the Model and Transparency gun not targeting the glass.  The pods seem to get in the way a lot which is a pain when your remodelling lots of glass.  


This is a back/side shot of the submarine raft from the new pier.  I'm still pleased with how it turned out.  I'm not a huge fan of leaving the pods as standard I would rather replace them with another material and make them invisible but the increase of structure count would be crazy high.


So I started my first way station in the redwoods.  I've been messing with how I want it to look.  I've replaced the entire thing (foundations and all) a few times now.  I have an idea I'm aiming for but as with all Ark projects I'm keeping an open mind as I may adapt it as I go along.  This is still a very early stage of building.  As anyone that has been through the rest of the posts if I really get stuck in buildings can go up exceedingly fast.  Once I nail the look I'm after it should progress a lot faster.

I also decided to alter the font back to something more simple.  I had to go looking for some information for someone from one of my earlier posts and hadn't realised how much of a pain it was to read.  Hopefully this is an improvement.

Sunday, 23 July 2017

Ragnarok - Day 29 and 30

I wanted to have a play with S+ underwater pods and adv rafts to make a sub.  Now I was orig planning to do a traditional sub but I realized I didn't need to conform to that.  I messed with the design a number of times and spent a lot more time than I would like to admit trying to blend the change in angles into each other.


Its funny the end result makes me think of the Daedalus from Stargate.  I had thought of removing all the pods sides and replacing them with another material but I hit the build limit.  I managed to remove a number of tiles I had put in place mostly to assist snapping.  This is a method I've used in the past.  Leave a few extra things in place then as you fill it you have a small margin for error.  When you run out of tiles you can just trim out the extras.  The forward sections are all one way glass with no sides so the view is great :)


The raft has a few foundations just to cover up the wood and I've added a raised landing platform.


The inside is surprisingly spacious, far more spacious than I really needed lol.  Like that hasn't happened before ;)


This is the central passage to the front of the ship.  I've not snapped many internal shots because of the angles it doesn't show things off well enough to bother.  This was orig going to be two posts but I forgot to make the post after the first day so I decided to just merge the two.  Its not like I had a huge amount of content to spread into two because of the nature of the build there was a lot of adding and removing trying to get the best shape with the space I had.

Thursday, 20 July 2017

Ragnarok - Day 28

This will be the first post I've made without any images.  I added a number of canvas's around the place and tidied up a few last bits today.  There was a lot of stuff done but nothing to show for it lol.  I dressed the mystery bedroom under the ramp but that won't be capped onto here just yet.  These two bases are about as complete as they are going to be for now.  I will work on a proper dock near my seapen at some point but that will prob happen after I've built a few rafts.  The next item on my agenda will be to construct some way stations in various spots of the map yet to be decided.

I'm glad to finally feel like such a big project is pretty much done (even a couple of days ago I wasn't sure how long it was going to take).  It has already been a fair bit longer than I had expected it to take but you get that with the big jobs lol.  As I have said in a recent post there are rooms still empty in the storage base but that was always the plan.  I need space to expand into :)

Oh I just realized I put together a quetz cage in the last few days and didn't screencap it.  I must get round to snapping it :)

So the storage base ended up with a number of vanity builds but not limited to:

Courtroom
Library
'Dance' club ;)
Boxing ring
Inverted Towers
 - 1 with Cafe
 - 1 with private quarters
Kitchen quarters with Bar

The 'Fortress' base has:

School
Cryo Facility
Medical Ward
Medical Lab
 - With Quarantine room
Guest wing
 - Sleeping quarters
 - Living area
Barracks
Underwater hive room

I think summing it up that I actually have more vanity builds than my last completed big base did (the one from Mazion's tour vid)

I still plan to get round to posting a few snaps from some of my original Ark builds too so there will be more things to come :)

Wednesday, 19 July 2017

Ragnarok - Day 27

Well today turned out really great.  I had a buddy of mine (L360) pay me a visit today.  He didn't get the full tour due to time limitations (that we breached anyways lol).  Finally got some decent feedback on the progress of things which filled me with a renewed vigour.  We ended up in "Gardeners, Gardeners, Gardeners" where he had a great idea for some shelving behind the bar using catwalks (like the bar is made from).


For starters this is where my storage base is located.  It turns out that L360's base is only just a stones throw away from my build location lol what are the chances ;)


Here is us mucking around with the shelving.  Which evolved rather quickly.  His thoughts were to trim it with a pillar which turned out to be a bit of a hassle with snaps and such.  Even with the pillar breaching the ground it kept disconnecting when we dropped out the supporting ceiling lol.  In the end we managed a work around which lead onto a far more annoying to snap idea of adding doors to the shelves and turning it into a cabinet!


It turned out amazing!!!  We had to leave some invisible glass railings on the underside of the catwalk so that the double doorframes would stay attached.  There was so many overlaid snaps in the area that getting them to snap into where we wanted was a challenge to say the least.  Thankfully between the two of us we managed to sort through them and end up with this :)  


He decided to get into the mood of the location (in one of the bedrooms behind G,G,G).  He picked the one with the chains hanging from the roof lol.    This is the only room I can see that has the new cabinet shelves penetrating it so a few bottles made it a thing :)  

Cya L360 thanks for stopping by :) 


With renewed enthusiasm I went through some of my existing vanity projects and tweaked things.  The cryo facility has had an upgrade that gives a much better vibe!  Can you guess the parts used to make the contraption in the middle?


I've moved the hives out (they are now in the seapen (yes really the seapen)).  Sorry I forgot to screencap that bit but to be honest its nothing special.  Just a few underwater cubes with hives in them.  I must get round to seeing if the bee's can sting you underwater lol.  So in the hives place I kept the airlock and made the area into a medlab.  I was going to try use the multi lamps to make a mic and do a recording studio but I couldn't get any to cover the extra 2 lights for the look I needed.  I'm happy with how this turned out.  There is enough going on to give the right atmosphere.  On the outside of the airlock another airlock facility was added.


Instead of blending it into existing structures I went with a look that suggests that it was added as an after thought (which is true).  There are a couple of angles at the back which are awkward and I like it for this.  If you can't tell this is my quarantine room.  All this is across the hallway from my hospital wing so it all ties in rather nicely.


The hospital wing got a tweak as well.  It now has visitor seating in the middle and I used some crop plots from Adv Rafts to add some life to the place.  I embedded the piping in the wall which incidentally means you can access the tap from either side of the wall lol.


One of the comments L360 had was that the middle of my underbase needed something in the middle.  I had always planned to do something but couldn't think of anything.  He thought some kind of pillar would be good but in the end I created what I had orig hoped would be the major light source for my underworld.  It has a few internal lights and 3 searchlights pointed at it.  The beam is the transmitter in my crafting room which took a few goes to center it.  I've used a standard transmitter in this case so I can turn it off when I don't need it to look so good :)


I added some tri roofs to the existing structures and came up with this which works for me :)


I also got round to adding a platform down here to place and indust forge.  It may need some tweaking but its workable.  And I've added a hatchframe above so it can be accessed from the top level (only using the res transfer gun).

So this new base only has a room or two to complete now :)  There is a room I keep meaning to revisit at the storage base but once that is done I'm prob gonna leave the rest as is for now.  There are a few empty rooms in the storage base but I want some space for expansion rather than filling it all from the start.  I may have already mentioned this in one of the prior posts.  I just remembered another room 2 rooms that actually do need to be done but they shouldn't take too long.  I've already got some ideas for projects to do after these few things are completed!  I can't wait to start some new bits!


Monday, 17 July 2017

Ragnarok - Day 26

Got another good day of vanity building in and ran into one snag that I hadn't anticipated...


I reclad the central storage so it has battlements to match the rest of the build.  I wasn't happy with how it was looking before.  I think it ties in with the rest of the build far more now.  I was planning for the railing drop across the top vault to be just wall but I felt it made the top seem far too big in comparison to the lower part.  I decided to leave it as a railing and am quite happy with it now.


Today I built a cryo facility.  At least thats what its meant to be...  I had to cheap out on them in the end sadly.  I had planned to use the Joans egg incubator in the bottom of each 'tube' which when turned on looked bloody amazing.  However you can't place more than one in a fairly large area so that screwed that idea...  Now its the adv raft small crop plot (oh so exciting).


I used the adv raft beacon and small and large cans to create the look I managed.  I wanted something that looked a bit more technical which, with the parts to hand isn't that easy.  I also stuck an S+ mutator in the middle of the beacon along with an S+ standing torch.  I had planned to continue just using the beacon but it requires fuel so torch it is.  At least I got the interesting shape from the beacon.


One of the landing pads is now a guest wing.  It has a rather tidy little kitchen with breakfast bar style seating and a few actual dining tables.  I overlaid the grills fridges and S+ metal storage boxes to make the kitchen equip mesh together nicely.  I'm a big fan of the metal storage boxes you can do all sorts with them.  I just wish you could snap them downwards.  You can build from the bottom upwards to your hearts content but if you remove the bottom row (this leaves them floating) then decide to change things you have to re lay the whole lot.  I've built whole kitchens using the metal storage boxes before although I'm not sure I have a screencap of that.  I must go through my old screencaps and sort them out as the folder is getting rather full now ;)  Some of the older screencaps are from before my PC upgrade so the quality is really bad.


Along with the kitchen/dining area there is a lounge and through the doors on the right a couple of toilets leading onto a couple of showers.  


Across the other side of the landing plat is the guest rooms.  4 rooms in total each with its own toilet.  I've not capped them as the rooms are too small to get a decent shot.  Just imaging a four poster bed, bedside cabinet and a large storage box for wardrobe.  

So the snag I ran into...  Well I set the beehives and everything was/is going rather well but I've now fed the hives and they are all active.  Prior to this I've been around hives without a worry as long as I don't access them.  But it seems the room doesn't contain them and I was rendered unconscious on the landing platform above.  I may have to rethink that particular idea as it is rather problematic.  Its a good thing its across the hall from the hospital ward lol.  I left render and returned to see if that made a diff.  As long as I didn't hang around they didn't seem too worried about me but if I stood still they started to sting me.  Not sure if I'm going to remove and replace it or not I'll have to have a think.  All of the landing pads have builds in them now so I was hoping to keep it (especially as I don't have a replacement idea in mind lol)

Sunday, 16 July 2017

Ragnarok - Day 25

Had another day off over the weekend but got a reasonable amount of progress done in a few short hours today.  My center map has no longer got dino's on it.  A whole stack of them I just realized are currently sitting in the transmitter (oops).  I must remember to liberate them before long.  I was sitting looking at my build and I was thinking about all the rooms I have currently set aside for random vanity projects and realized I hadn't really done much vanity building in my playable base.  So today I sat down and did a few.  Only a few because I'm currently drawing a blank as to what to fill some of the spaces with.  If I was to redo previous idea's I could fill the spaces in a few hours without really having to think about it.  I've considered doing a bottle shop, furniture shop (lol this would be super easy just rows of the same furn in a large space) but I don't want to cheap out tooooo much lol.


I had to screen cap this visual glitch lol.  This is my critter room and it looks like they have crapped ALL over the floor.  I did a roll back on my gfx driver to the one I was using prior to the recent update.  Its a MUCH older version but I don't get the regular crashes and with an up coming event I can't afford to have it bail out on me.  The event in question is still up in the air a bit.  I'm pretty sure it should come about but I don't want to announce it properly as real life happens :)  


So in my new base's landing platforms I have a nice big area to work in.  I had thought of leaving them empty but I want to be sure I have plenty of content completed for said event.  So this is the first project and its pretty simple yet I really like how clean cut it came out.  I could do with prob putting some posters on the wall to give it a final classroom kind of look.  


I've even included a small locker area with toilets and down this bottom right some extra books and refreshment area.  I've decided to leave the roof as one way glass so it feels like there is no roof on the room.  It makes the space feel nice and large and seriously who wouldn't want a massive skylight in their classroom?  Well prob the people in this class as its under a landing pad they will be watching the rear ends of the fliers that will eventually be using the pad lol.


Under this landing pad I have made an airlock entrance into my hive room.  These are all S+ hives which I only just remembered will actually water your plants.  I should have incorporated this into my greenhouse but no matter.  I also found out today that my normal method of eating mushrooms as food has been messed up.  I've been running infinitestats and god during the major construction this time round (I have a habit of jumping/falling from heights) so I hadn't been using food until today.  Well my dude is completely tripping balls on mushies right now.  Its a bummer they have been a great source of food till now.  I might have to mess with custom recipe's as meat always spoils too fast.  It was Bull (my old tribemate) that got me into using them as food as at the time they didn't have a spoil timer and gave about as much food as cooked meat.


This is also a rather plain space.  I feel like I need something in the middle of the room just to tie things in a tad better but I made myself a hospital wing.  This is a luxury hospital with nice double beds :)  I considered the standard beds but they look too dirty for this project.  If I can think of any additions I might fill in a little of the space in the middle.  I'm thinking a few couches would be ideal as a waiting area for visitors.


Oh and in the underbase entrance bridge I've allocated the space as more stables.  It seems that the small stable area I made wouldn't house all the horses I already had so I expanded into this space.  I knew it would come in handy :)

So I'm gonna have to spend some time today brainstorming some new idea's for vanity projects.  I'm hoping for about 3 more to fill the spaces I want to complete.  Fingers crossed I have at least one idea while I'm at work that I can build when I'm next on.  If not I will rework one of the rooms in the storage base that I decided I wasn't happy with.  (And deploy the last of the dino's from their digital confinement lol)

Friday, 14 July 2017

Ragnarok - Day 24

Moved over a bunch more of my dino's into my storage base.  Its starting to fill up pretty quick but it's looking pretty good.  I have a few empty rooms that aren't for dino storage but I think I will leave them empty for the moment until I have some new idea's on what to do with them.  I spent a bit of time under the newer base and painted the castle structure under there so it stands out better against the outer stone wall.


I wasn't too happy with how it was blending in so much.  I don't think I've mentioned this but I'm colour deficient and only see 10% of the colour spectrum.  Maybe it would look ok to everyone else but to me it was just blurring together.


 I promised a better shot of the under base entrance and here it is also painted black.  I've added a room under it which will be empty for now but its another space for a vanity project.  I seem to have ample rooms set aside for vanity projects lol.  I might need some suggestions on what to fill them with.  I won't be adding any more mods (I don't want decor mods that make things too easy or too prefab) so I have to come up with idea's that I can build with what supplies I have available.


I decided to try something different to hide the underside of the entrance ramp.  Normally I would box the area in and be done with it but this time I went with another route.  I decided to have a go at upside down building.  I've done the inverted towers which inspired me to want to try an actual upside down base but this is different entirely.  The towers are built to look upside down where this is in fact inverted completely.  I didn't wat to build it with the wooden framework showing on the underside (which would detract from the end result).  I noticed when snapping to and around the ramp that some of the ceilings were snapping upside down, so I used that to start things off.  The very bottom/top tier does have ceilings the correct way up but I couldn't seem to get them to flip with all the existing snap points.  As you have to be almost under them to notice I wasn't too worried about them.


Here's a shot looking into the structure where you can see the ceiling tiles in their inverse position.  I wondered about making accessible rooms within it but with the ramp in the way I decided against it this time round.  


I've done some weird building in Ark but I have to say constructing inverted has to be the weirdest.  It considers the snaps inverted as well so you have to take that into account.  For eg I built it outwards and downwards first and completed the battlements before extending it upwards towards the ceiling.  To add the outer section of ceilings I had to extend a wall upwards an extra to create a snap point it would let me use.  Anyone that has built a wall downwards and tried to snap a ceiling to the bottom knows that you have to have the extra wall in place to get the snap.  


Here's another shot in better lighting for the contrast of colour.  I really like stone in black it looks great.  I found however, that the half walls only paint on one side for some reason.  So from the inside of the battlements there are patches of unpainted stone work.  Hopefully this will be addressed at some point.

Thursday, 13 July 2017

Ragnarok - Day 23

Another day of piping.  I've piped in most of the storage base now.  Nothing very exciting to post in that respect but I did do a quick vanity courtroom.  I'm not sure its complete but I wanted to get something done that wasn't piping so I could at least post something.


I didn't bother with making a stand for the jury because this particular courtroom isn't so democratic lol.  


I also did another little bar area with seating around the 'exploded' windows.  I know most ppl call them bay windows but 'exploded' sounds much cooler ;)  With the amount of bars I have in this base I'm gonna be pissed constantly rofl

Wednesday, 12 July 2017

Ragnarok - Day 22

While a fair bit was completed today I've not really got much to show for it.  I did the piping on the newer base which didn't take as long as I thought it might.  I was less worried about keeping things as tidy as I used to now you can hide the pipes and use the flex piping.  I wish these options had always been available!  My orig online build had like 7-8 intakes and the area that they were deployed was a complete spaghetti mess.  Although I also have a few tricks I didn't know to use back then for tapping underground water.

I did however start the process of importing all my dino's to populate the base.  A rather boring endevour I must admit but on the plus side Ark has been loading and closing sooo much faster for me of late which def helped.  I did have one hiccup while deploying the dinos...


The thyla got hijacked by a giganto!  In fact there are actually 2 thyla there.  And an ovis but you can't see them as they are all merged.  Ooops I deployed too many in one go lol.
 

But I did manage to get them sorted.  I did find one snafu in the design.  The level below this one while it fits Rex's perfectly (even dismounting without being embedded in the ceiling) the spinos stick through the ceiling.  So I've moved all the Rex's to the lower level and leave all the spinos on top.  I may need to reduce one of the balconies for more space as it seems I still have a fair few spinos lol.  I have moved maybe half my dino's across now so still more to be done there.  But its a start :)